
Sourdough has been around for centuries, proving itself to be one of the oldest forms of breadmaking in history.
While the first sourdough bakers may not have had access to the must-have sourdough essentials, like banneton proofing baskets, they probably understood the importance of proofing their dough. In fact, any baker worth their salt knows that proofing is a crucial step in the baking journey, which is why I have compiled a comprehensive care guide for your own banneton proofing basket.
Starting with what a banneton basket is to choosing the right basket for your needs and then adequately preparing it for proofing with flour, you’ll find everything you need to know about banneton basket use and care right here.
I’m here to lay all the details out there on the figurative kitchen worktop, answer every lingering question and leave you feeling confident enough to get started on your bread proofing journey. When you’re done with this guide, you’ll be whipping up perfectly proofed sourdough loaves like they’re going out of style.
Jump to:
- Oval Banneton with Cloth Liner
- The Complete Sourdough Starter
- How to knead, fold and stretch sourdough
- Sourdough Bread Recipe
What Is a banneton basket and why is it important?
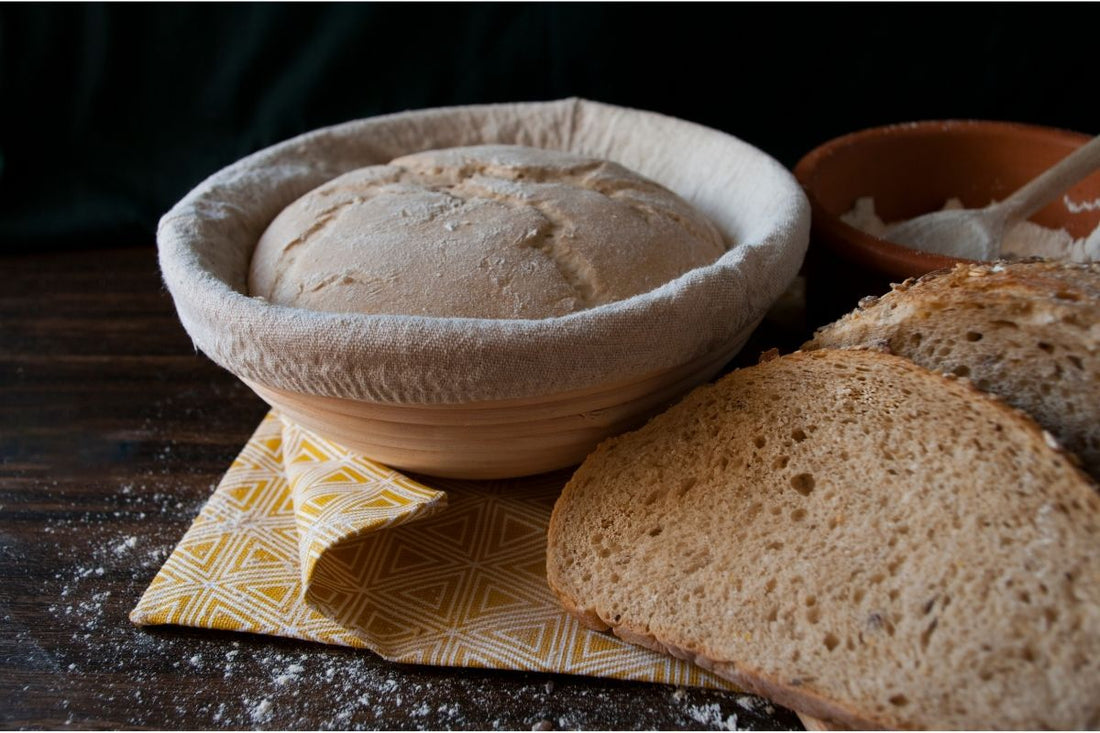
A banneton basket, or proofing basket, is a small basket usually made from rattan that is used to hold the shape of sourdough bread. Without a shaping container, like a basket, sourdough will lose its shape and will spread out during the proofing stage.
You may be wondering: Why not just use a bowl? Well, this is because banneton baskets are purpose-built shaping containers for artisanal bread that allow the dough to breathe during the proofing process.
If you’ve ever noticed the artisanal spiral pattern you often see on sourdough bread loaves in bakeries and cafes, this is because of banneton baskets. The rings around the banneton basket imprint the pattern onto the dough while it is proofing, which gives it that signature spiral.
While banneton b askets come in various shapes and sizes, the most popular proofing baskets are oval and round – as this is usually the shape bakers prefer their sourdough. But, this doesn’t mean you can’t find other shapes, like triangular or heart-shaped, if you want to showcase your creativity.
How to prep your banneton basket
For bakers who have never used a banneton basket, or have upgraded to a new one, there are a few things you can do to ensure you get the best results every time.
While some banneton baskets come with a liner, like this Oval Banneton, you can opt to use your basket without one by following these simple steps:
- Wash prior to use and allow to fully dry
- Ensure that all the labels are removed
- Lightly mist the banneton with filtered
- Lightly dust the banneton with flour, trying to get it into all the grooves, and let it dry.
- Once dry, tap out the excess flour over the bin to reduce the mess
Once you’ve prepped your banneton basket with flour, then you are ready to pop in your dough for proofing.
What if I want to use a banneton basket liner?
If you prefer to proof your sourdough with a liner inside your banneton, then you will not need to dust the banneton with flour.
However, you will need to lightly coat the liner with flour before popping in your dough to prevent it from sticking to the fabric.
The easiest way to do this is to rub the flour all over the liner to coat it, making sure you really work the flour into the fabric so that it becomes non-stick.
Banneton liners are designed to sit inside the banneton and then the dough sits on top of the liner, which also means that your dough will not feature the signature spiral patterns from the basket and will have a smooth finish.
But, this also means that by using a banneton liner you can unleash your inner artist and score your own intricate designs on your sourdough after proofing.
It’s important to note that you don’t need to wash your banneton liner after every use, so long as it’s not covered in sticky dough. Simply shake it out and allow it to dry thoroughly before storing it with the banneton for later use.
If you do decide to give it a wash, then wash it separately to your clothes to ensure they aren't damaged by the flour.
How to use a banneton proofing basket for making sourdough

Banneton proofing baskets are simple to use. Once the banneton has been prepped for use, following the above steps, it can be used to hold your dough.
Simply place the shaped sourdough into the banneton with the seam up – meaning the top of the dough is sitting on the button of the banneton. By doing so, you can ensure the top of the dough will be facing up when you flip the dough onto parchment paper after proofing.
Once the dough is placed into the banneton, you can lightly sprinkle flour around the edges if you feel the need. This is a good idea if the dough is particularly sticky, but if it has been shaped correctly you shouldn't need too much.
Next, leave the dough in the banneton to proof at room temperature for around 12 hours or in the fridge overnight. After that time, check that your sourdough is fully proofed by look and feel i.e. it should be about double the size and should spring slowly back when poked.
How to clean a banneton basket
When caring for banneton baskets, it's important to keep them from having too much excess flour. You don't need to wash them after each use, unless they have excess sticky dough inside.
Once you've put your sourdough in the oven to bake, it's a good idea to bang the banneton over a bin to release excess flour. You can also use a paint brush or other stiff bristle brush to easily dislodge the flour.
Once the excess has been removed, simply allow the banneton to air dry before you put it away for next time. Be mindful that spring bannetons inside plastic bags are not advised, as this encourages mould to form, even if you think they are well dried out.
Generally, you don't need to wash your banneton baskets – the cleaning routine above is enough to maintain and care for your banneton.
However, if you have a heavy build-up of flour or have some sticky dough on it, you can rinse it under cold water and use a stiff bristle brush to clean the excess dough and flour.
Once clean, use a dry towel to remove excess water from the banneton so it's just damp. Leave it somewhere warm, with good air circulation to allow the basket to fully dry out, like the kitchen benchtop.
How to store your banneton basket
As mentioned above, it’s important to store your clean banneton somewhere warm with good circulation to allow the basket to fully dry out and discourage mould from growing.
Once dry, I often store mine on top of a kitchen cupboard or the fridge where there is plenty of open air.
Baker’s tip: Placing your bread proofing baskets in the oven for 45 minutes at 130˚C will effectively destroy any mould that has formed. Mould and flour residue will also be easier to brush out, so you'll be left with a clean, dry banneton once more.
Now you know everything there is to know about how to use, clean and store your banneton proofing basket, you can stock up on your baking essentials by exploring our online range. If you’re new to baking, this complete sourdough starter kit includes everything you need to bake your first loaf, or perhaps you’re looking for some more sourdough inspo from our Sourdough Stories blog.
If you need some more sourdough content in your life, be sure to follow us on Facebook and TikTok and check out @youkneadsourdough on Instagram and hashtag #youkneadsourdough so we can marvel at your sourdough masterpieces.